
This section gives details on how to accept crypto payments on your website using Blockonomics API
Setup
You need to complete the below steps to start receiving payments
1. Add a wallet
- Click Wallets.
- Click "Add a wallet".
- Select what type of crypto currency you want to use for your wallet.
- Fill out the wallet form and click "Create wallet".
2. Add a store
-
Click Stores.
-
Click "Add a store".
-
Fill out the store form and click "Create Store".
-
Enable crypto on your store and select the desired wallet.
-
Set callback URL on which you want to receive payment callbacks. If you are doing dev on localhost you can use ngrok to get a callback.

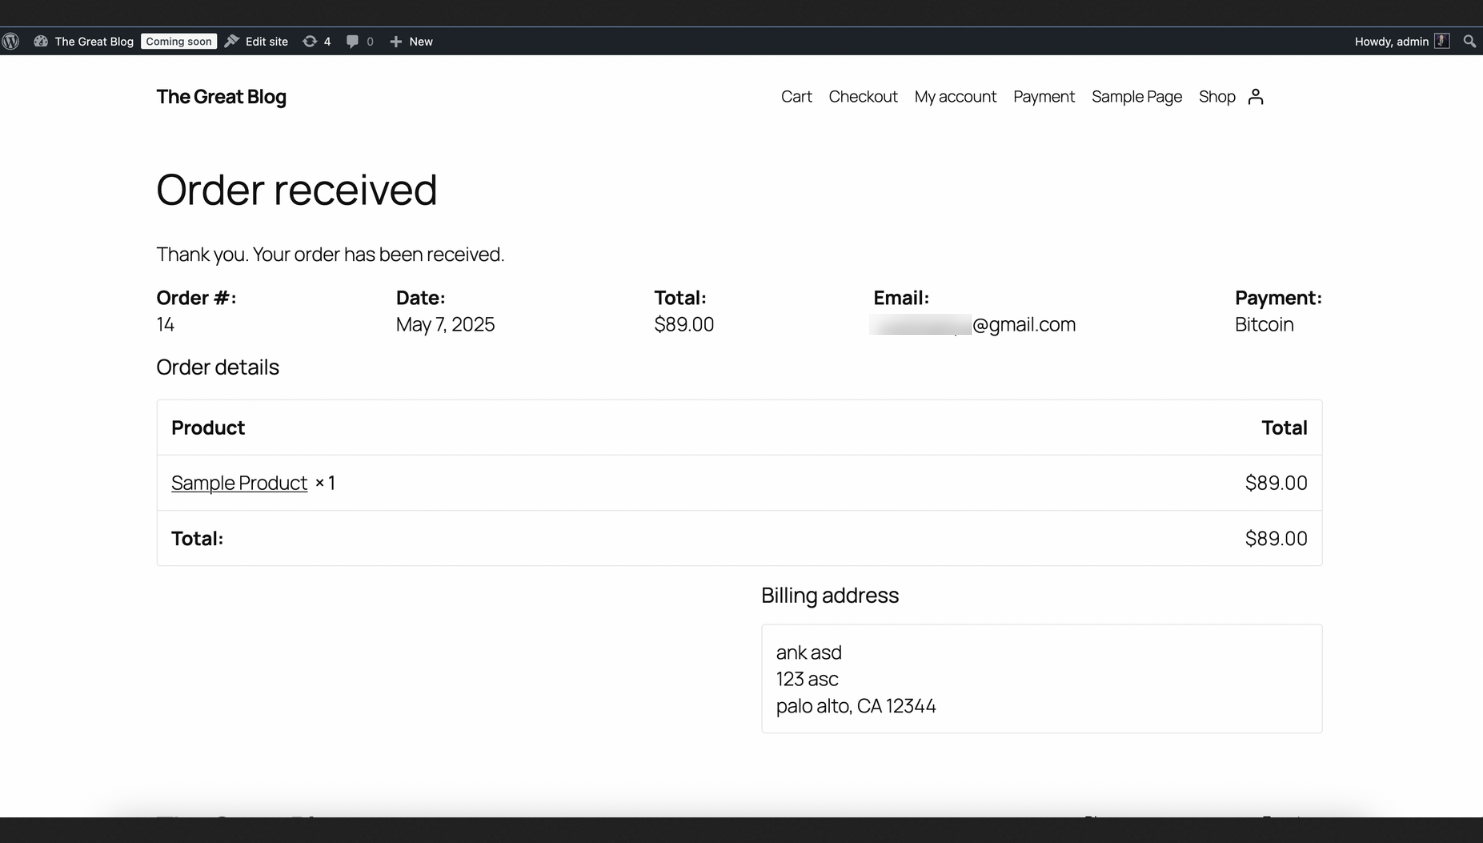
Sample store with BTC payments enabled
Overview
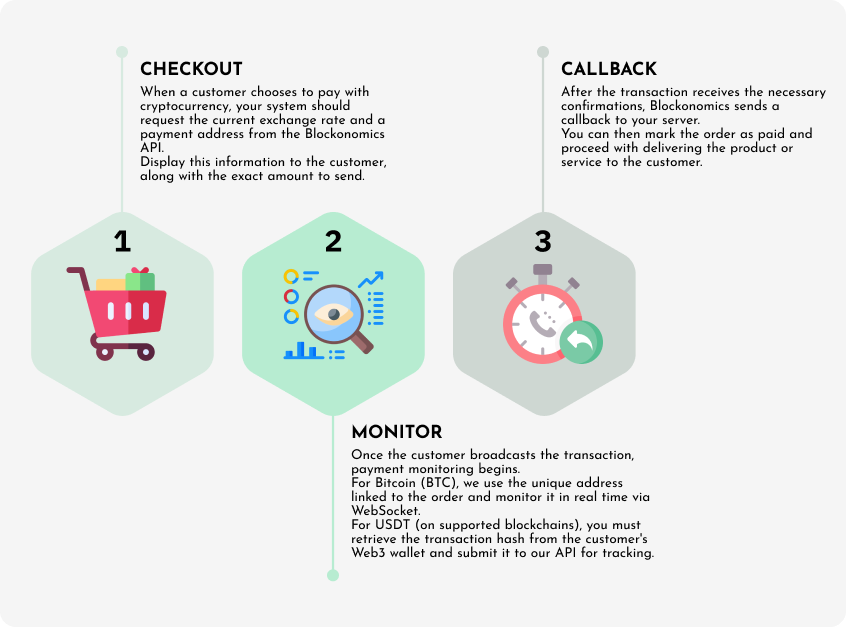
Overview of stages in Blockonomics Payments API
Blockonomics Payments API provides a unified API to receive crypto payments. Overall the stages - Checkout, Monitor and Callback are the same for both BTC and USDT payments. There are minor nuances/differences which are detailed below.
BTC Payment Flow
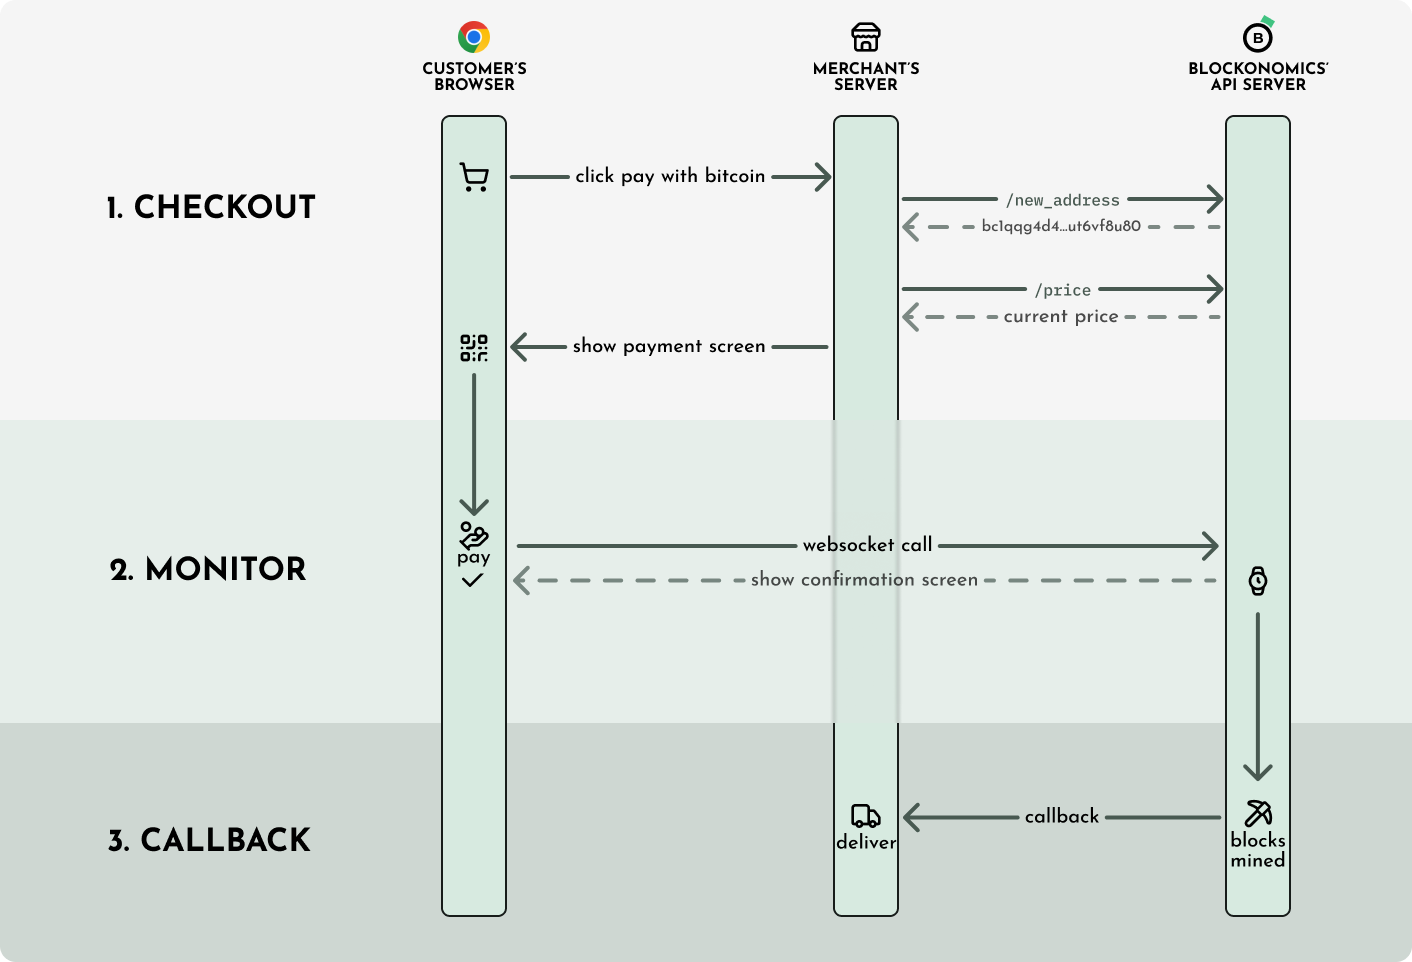
Checkout
As customer does checkout, he is shown the cart value along with a unique bitcoin address/amount to pay. The merchant server must call Create or Get Payment Address and Fetch bitcoin price endpoints.
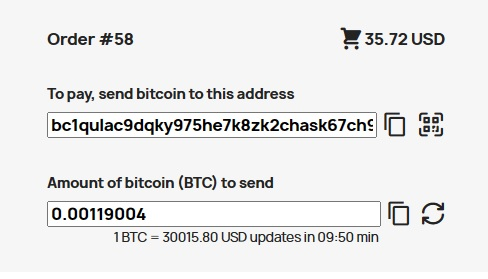
An example bitcoin checkout UI
It is a common misconception that the customer has to pay within the alloted 10/15min else the bitcoin address will expire. This is incorrect, bitcoin addresses generated by the Blockonomics API never expire. The time period is only to lock in the price, so that the customer gets a discreet bitcoin amount to pay. In case of bitcoin it is always recommended to generate a unique bitcoin address for each checkout.
Monitor
Customer sends bitcoin as indicated in the checkout from his bitcoin wallet. Now since bitcoin confirmations take time (1 hour - 1 day), we cannot ask the customer to stay on the checkout page for a day waiting for block confirmation! Instead, the customer is shown an order confirmation screen as soon as the unconfirmed payment is detected. To detect the unconfirmed payment, use the Receive payment notification websocket call.
A sample order confirmation screen that can be shown to the customer
⚠️ Never deliver product after receiving websocket notification on browser. Unconfirmed transactions are not reliable and browser/client side code can easily be seen/changed by customer.
Callback
Merchant server will receive a Callback Notification when the bitcoin transaction gets confirmed. Now the customer order can be marked as paid and the product can be delivered.
USDT (ETH ERC-20) Payment Flow
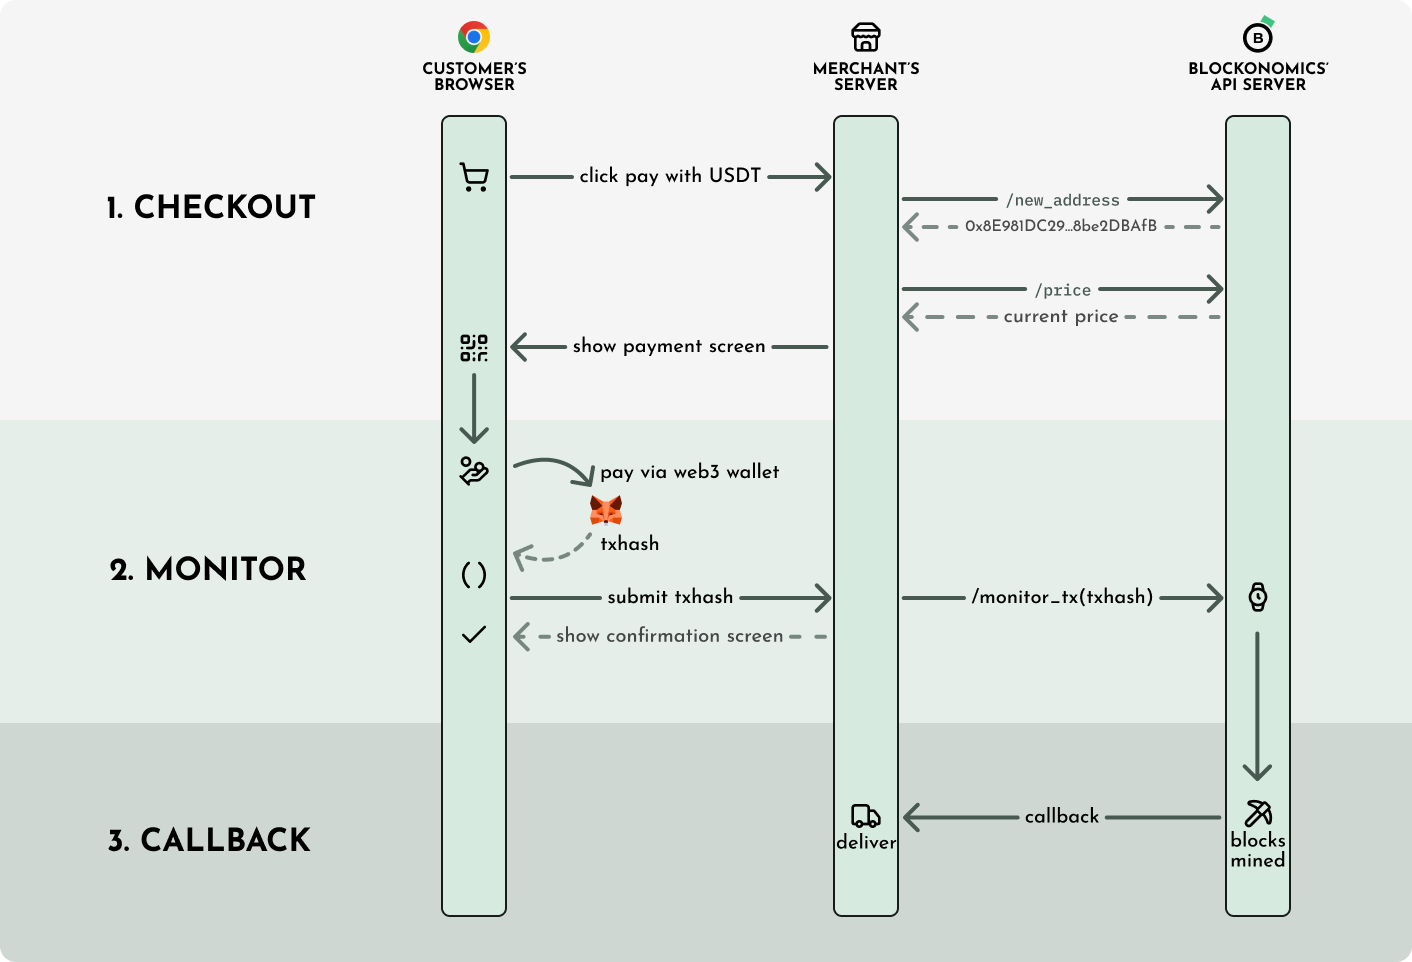
Checkout
After the customer clicks on Pay with USDT (ETH ERC-20), the merchant server must call Create or Get Payment Address. This will return an address like:
0x5FbE74A283f7954f10AA04C2eDf55578811aeb03
To get the price, simply use the Fetch cryptocurrency price endpoint. For example, if you are using EUR:
/api/price?crypto=USDT¤cy=EUR
This will directly return the value of 1 USDT in EUR.
Monitor
To enable customer to pay with web3 wallet you must show our Web3 USDT Component on the checkout page.
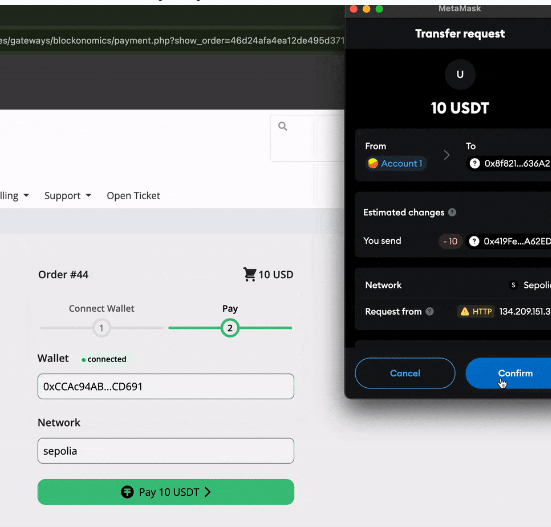
Example screenshot of customer paying USDT via Metamask
After txhash is received, an order confirmation screen can be shown to the customer. Merchant server must call Monitor USDT Transaction endpoint with the txhash received. This is done so that Blockonomics server is notified that your server has to be sent a callback when this transaction is confirmed on the blockchain.
Callback
Merchant server will receive a Callback Notification when the transaction gets confirmed. Now the customer order can be marked as paid and the product can be delivered.